How to Turn Photos and Text into Paper-Style Animations
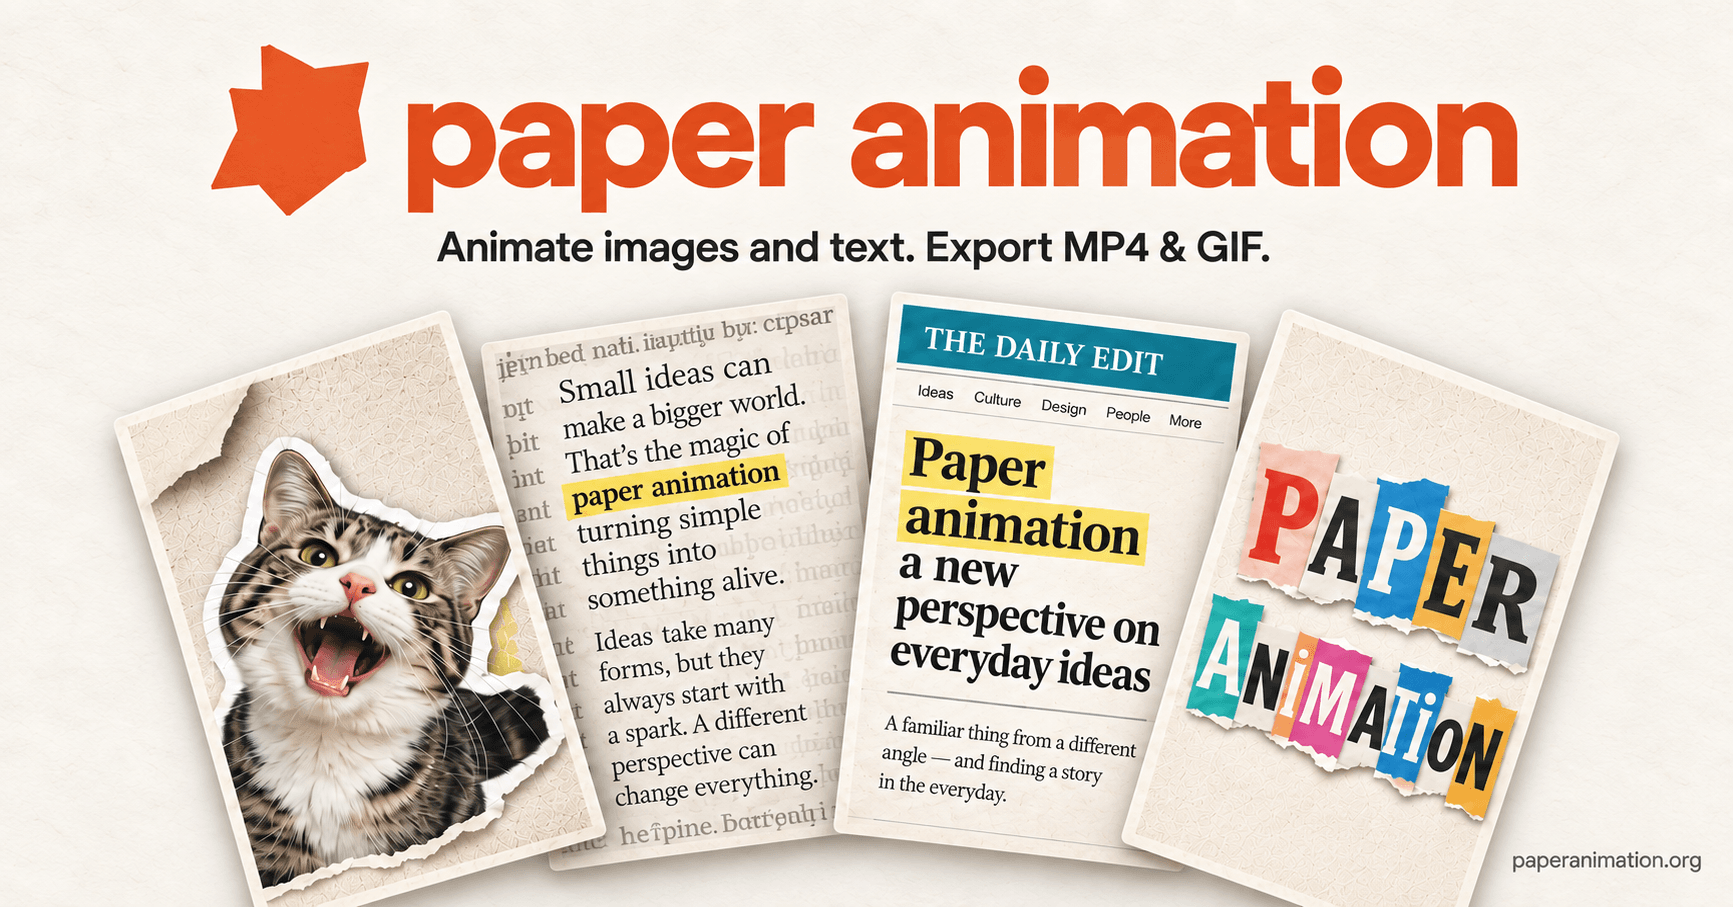
A still photo can show a product clearly, but a short reveal can give that same image a useful role in a video. A folded edge introduces an object. A highlighted line tells viewers where to look. Cutout letters give a title a handmade feel. The key is choosing a motion that supports the message.
This guide introduces Paper Animation, our browser-based tool for creating paper-style animations from images and text. It covers four effects, a practical workflow, and a few ways to keep the finished result readable.
Choose an effect that fits your message
Paper Fold works well when the image is the main subject. A product photo, illustration, or cutout can appear through a folding reveal. Keep the composition simple so the viewer can recognize the subject as it comes into view.
Newspaper Highlight puts the emphasis on words. It is useful for a short statement, a quotation, or the key idea in an educational clip. Choose one line worth remembering rather than trying to emphasize an entire paragraph.
Headline Match Cut gives a headline or phrase a moving presentation. It can introduce a topic, mark a change of section, or set up the next part of a video. Short phrases are usually easier to read when text is in motion.
Magazine Letters brings a cutout lettering style to titles and messages. It suits playful announcements, creative teasers, and collage-inspired posts. Leave enough space around the words so the lettering remains the focus.
Start with a small, specific project
For a first animation, choose one image or a few words. A product reveal needs a clear product photo; an animated lesson title needs a concise title. Deciding what the clip should communicate before opening the editor makes the later choices easier.
Choose an effect. Match the animation to the image or text you want to feature.
Add your content. Upload an image or enter text, depending on the effect. Image uploads support JPG, PNG, and WebP files up to 10 MB.
Prepare the cutout. For image-based work, use subject selection and background removal where needed. Smart Select, Brush, and Erase help refine the selection.
Adjust and preview. Review the available settings and watch the animation before exporting. Check whether the subject is clear and the text can be read comfortably.
Export the result. Save an MP4 video or GIF for the next step in your project.
Use the animation as part of a larger story
A paper effect does not have to fill an entire video. It can be a brief opening before a product demonstration, a title between sections of a presentation, or an emphasis moment in a lesson. Giving each effect a specific purpose helps the sequence feel coherent.
For example, a small shop could introduce a product with a paper fold and then continue with ordinary footage showing how it works. An educator could open a topic with magazine letters, then highlight one takeaway at the end. These are possible uses rather than ready-made templates for every project.
If you plan to combine the animation with other footage, green screen exports offer a way to bring it into a separate video editor. Preview the combined result there as well, since the surrounding background and text can change how clearly the animation reads.
Check the export before sharing
Paper Animation makes all four effects available on its free plan, with unlimited watermarked 720p exports. Paid plans offer watermark-free Full HD 1080p exports. Start with a free export to judge the composition, then choose the output quality that fits your project.
Before posting, watch the clip at the size your audience will see it. Check the edges of a cutout, the contrast around the text, and whether the last frame stays on screen long enough to understand. A simpler version is often the better choice if the movement distracts from the message.
To explore the effects, open the online paper animation maker and try one image or short title. Build a clear, useful clip first, then decide where it belongs in your next video.
Appreciate the creator