How to Create a Login Form Using Html + Servlet + Java + Xml

How to create a login form using HTML + SERVLET + JAVA + XML
___________________________________________________________________
In this article, we will build a simple Login Form using HTML+ SERVLET + JAVA + XML.
In this example, we will create an Employee Login Form and we will validate the employee username and password with the database.
Let me list the tools and technologies HTMLI has used to develop this application.
Tools and technologies used
1. IDE — STS/Eclipse Neon.3
2. JDK — 1.8 or later
3. Apache Tomcat — 8.5
4. MySQL — MySQL-connector-java-8.0.13.jar
Development Steps
1. Create Eclipse Dynamic web project
2. Add Dependencies
3. Project Structure
4. MySQL Database Setup
5. Create an HTML — Login.html
6. Create a LoginServlet.java
7. Create a conn.java
8. Create a web.xml
1. Create an Eclipse Dynamic Web Project
To create a new dynamic Web project in Eclipse:
1. On the main menu select File > New > Project….
2. In the upcoming wizard choose Web > Dynamic Web Project.
3. Click Next.
4. Enter project name as “login form”;
5. Make sure that the target runtime is set to Apache Tomcat with the currently supported version.
2. Add Dependencies
Add the latest release of the below jar files to the lib folder.
- MySQL-connector-java-8.0.13.jarIn Eclipse, paste these JAR files to your project directory: WebContent/WEB-INF/lib
3. Project Structure
Standard project structure for your reference -
4. MySQL Database Setup
Let’s create a database named “mysql_database” in MySQL. Now, create a login table using below DDL script:
CREATE TABLE `Login` (
  `username` varchar(50) PRIMARY KEY,
  `password` varchar(50) Not NULL,
);
Here is an Insert SQL statement:
INSERT INTO `mysql_database`.`login` (`username`, `password`) VALUES ("Ajay", "Ajay");5. Create a login.html
Let’s design a login HTML form with the following fields:
. username
. password
HTML
<!DOCTYPE html>
<html><head>
    <meta charset="ISO-8859-1">
    <title>Insert title here</title>
</head><body><form action="Login" method="post">
        Username:<input type="text" name="username">
        <br> password:
        <input type="password" name="password">
        <br>
        <input type="submit" name="login">
    </form>
</body></html>
6. Create a LoginServlet.java
Let’s create a LoginServlet.java class which contains JDBC code to connect with MySQL database. Add the following code to a LoginServlet class:
Java
import java.io.IOException;
import java.io.PrintWriter;
import java.sql.*;
import javax.servlet.http.HttpServlet;
import javax.servlet.http.HttpServletRequest;
import javax.servlet.http.HttpServletResponse;public class LoginServlet extends HttpServlet {    public void doGet(HttpServletRequest req,
                      HttpServletResponse res)
        throws IOException
    {
        {
            try {
                Connection con =databasessescon();
                System.out.println(
                    "connected with the database successfully");
                PreparedStatement ps = con.prepareStatement(
                    "select *from login");
                ResultSet rs = ps.executeQuery();                while (rs.next()) {
                    String username
                        = rs.getString("username");
                    String password
                        = rs.getString("Password");
                    String s1
                        = req.getParameter("username");
                    String s2
                        = req.getParameter("Password");                    PrintWriter out = res.getWriter();
                    out.println("username is : " + s1);
                    out.println("Password is : " + s2);                    out.println("username is : "
                                + username);
                    out.println("Password is : "
                                + password);                    if (s1.equals(username)
                        && s2.equals(password)) {                        out.println("You are login");
                    }
                    else {
                        out.println(
                            "Wrong user id password");
                    }
                }
            }
            catch (SQLExcep  tion e) {
                System.out.println("Error");
            }
        }
    }
}
7. Create a conn.java
Let’s create conn.java to process HTTP request parameters and redirect to the appropriate HTML page based on the employee login status.
Note: Connection con = DriverManager.getConnection("JDBC:mysql://localhost:3306/Database name","username","password");Java
import java.sql.Connection;
import java.sql.DriverManager;
import java.sql.SQLException; public class conn {
    public static Connectiondatabasesn()
        throws SQLException
    {
        Connection con = DriverManager.getConnectiJDBCjdbc:mysql://localhost:3306/mysql_database","root", "Ajay@1234");
        return con;
    }    public static void main(String[] args)
        throws SQLException
    {        Connectiodatabasesbasescon();
          System.out.println("Done");
    }
}
8. Create a web.xml
After an employee successfully login then this page shows a successful message on screen:
XML
<?XML version="1.0" encoding="UTF-8"?>
<web-app xmlns:xsi="http://www.w3.org/2001/XMLSchema-instance" xmlns="http://xmlns.jcp.org/xml/ns/javaee"
  xsi:schemaLocation="http://xmlns.jcp.org/xml/ns/javaee http://xmlns.jcp.org/xml/ns/javaee/web-app_3_1.xsd" id="WebApp_ID"
         version="3.1">
  <display-name>LoginForm</display-name>

  <servlet>
  <servlet-name>FirstServlet</servlet-name>
  <servlet-class>LoginServlet</servlet-class>
  </servlet>

  <servlet-mapping>
  <servlet-name>FirstServlet</servlet-name>
  <url-pattern>Login</url-pattern>
  </servlet-mapping>
</web-app>
Note that on the above page, we have used HTML action tags. Read more about action tags here.
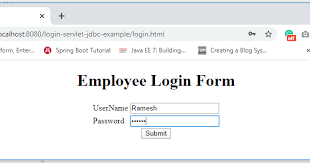
Employee Login Form

Login Success Page
You are login10. Related Articles
. html+ JDBC
. HTML + JDBC + MySQL Example — In this article, we will build a simple Employee Registration module using HTML, JDBC, and MySQL database.
. HTML Login Form + JDBC + MySQL Example — In this article, we will build a simple Login Form using HTML, JDBC and MySQL database.
_____________________________________________
Writer: Ajaydhangar
Appreciate the creator